Blind weeding is an optional technique that targets weeds before they emerge. By implementing this method, weed pressure can be significantly reduced not only during the early growth stages of the crop, but also throughout the entire season.
CAUTION 🤓👇
Before initiating blind weeding, ensure you have a thorough understanding of your crop’s germination status across all areas of the field.
This is particularly important in fields where germination is highly variable. Areas that are noticeably wetter or drier than the rest of the field can lead to uneven germination.
CONVERT FROM SEEDING TO BLIND WEEDING
To convert from seeding to blind weeding, follow these steps:
- Empty the seeding system and remove the seed container.
- Loosen the two clamps securing the seed containers
- Place a small box beneath the seed container outlet to catch any seeds that may spill. Carefully lift the seed container and allow it to fully empty.
- To clear any remaining seeds from the funnel, loosen the two bolts on the funnel and use the same small box to collect the seeds.
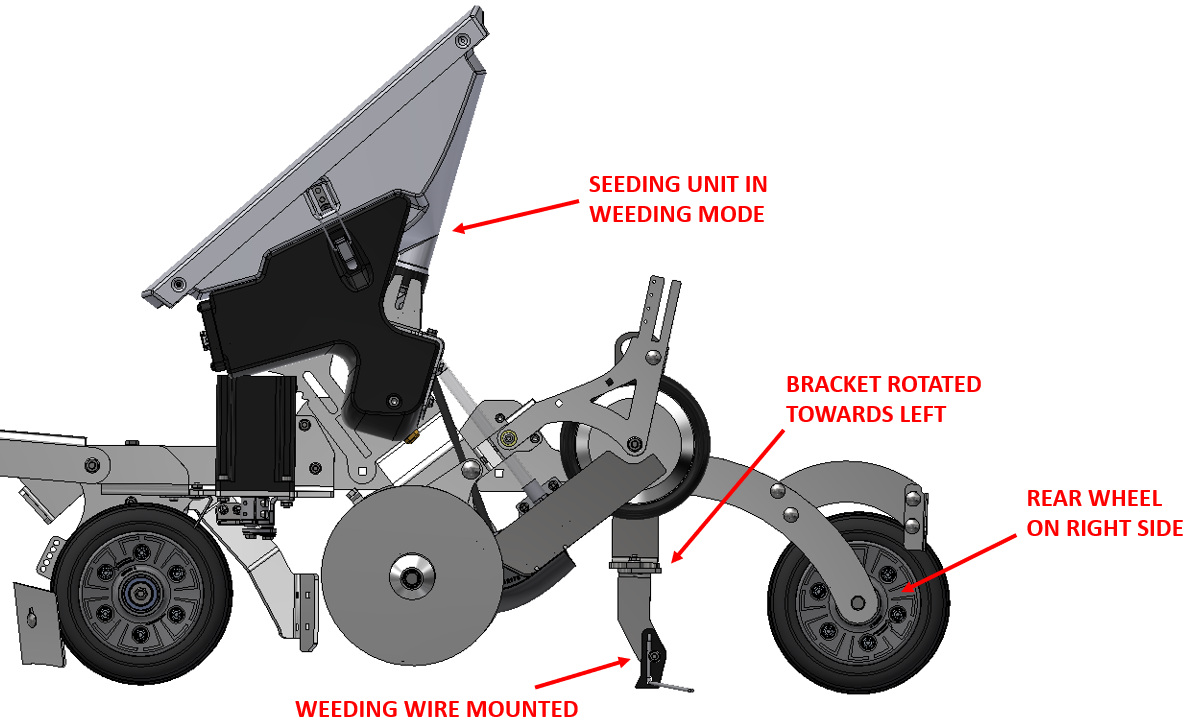
- Rotate the seed-cover plow support bracket 180°, ensuring the horizontal section faces to the left.
- Replace the seed-cover plow with a weeding wire kit.
- Position the seeding assembly in the weeding configuration, ensuring it matches the reference image below.

-
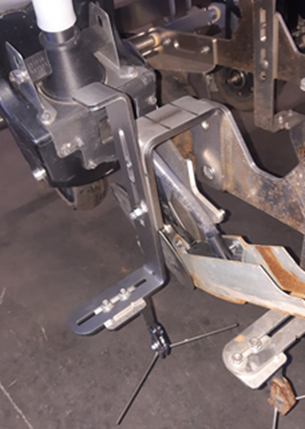
Install the additional weeding wire kit on trailer 1, located on the left side of the robot.
- Attach the U-bracket to trailer 1.
- Mount the weeding wire support bracket onto the U-bracket.
- Mount the weeding wire on the support bracket.
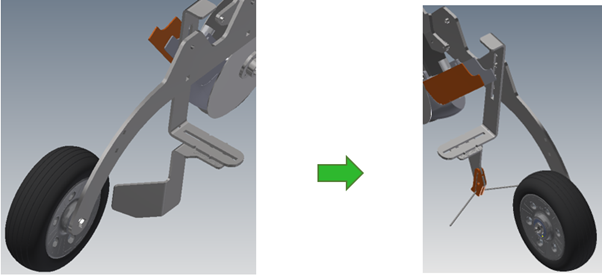
- Shift the rear wheel of the active trailer to the right side of the trailer frame, as illustrated in the image below.

- Adjust the working depth and alignment of the weeding wire.
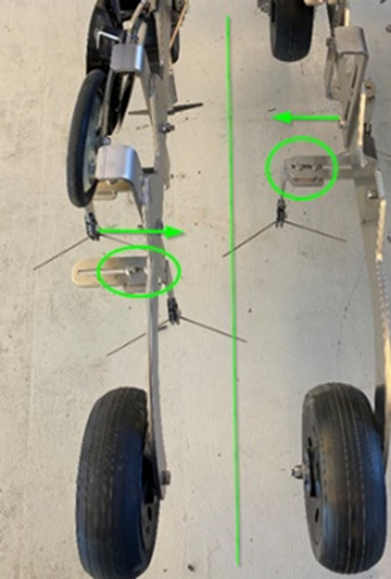
- On the active trailer, position the weeding wire to the right side as shown in the image below.
- On the passive trailer, shift the weeding wire to the left side as shown in the image below.
NOTE 😉👇
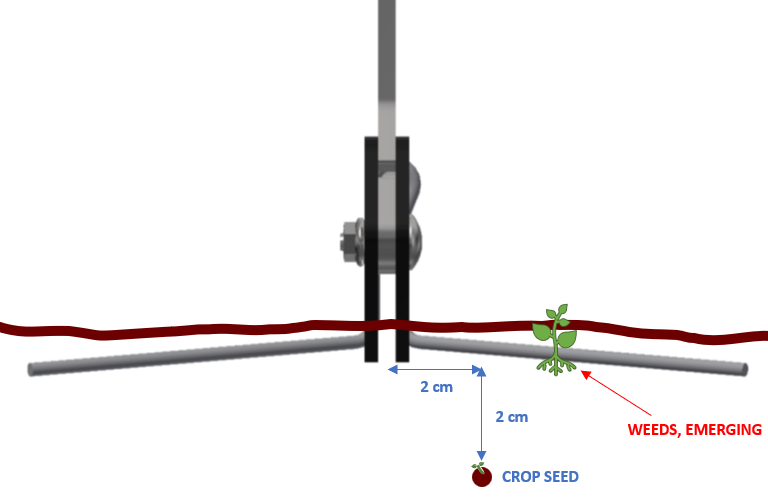
Ensure to get the correct position of the weeding wire.
- Align the center of the weeding wire approximately 2 cm to the left of the seed positioning.
- Set the height of the weeding wire so it is about 2 cm above the seed.
- Activate weeding function in HMI.

- Set the route in the HMI settings and start the robot.
- Closely monitor the operation to ensure the weeding wire is maintaining the correct working depth.
WARNING ⚠️
If the weeding wire is set too deep relative to the crop’s current germination stage, it can damage the crop’s cotyledons.
FINAL CHECK