
Replacement of DB9 on the RS422/485 communication module in the main electrical box.
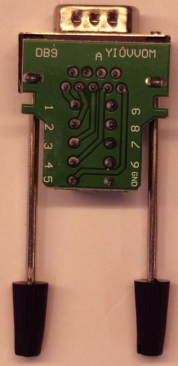
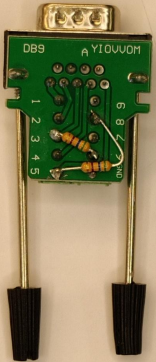
| Old version | New version |
 |
 |
Step 1
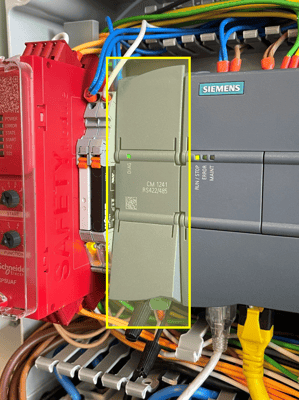
Power OFF the robot from the main switch, then access the main electrical box of the robot and identify the RS422/485 communication module.
Step 2
Lift the lid at the bottom of the communication module.
Release the long mounting screws to unmount the old version of the DB9 from the communication module.

Step 3
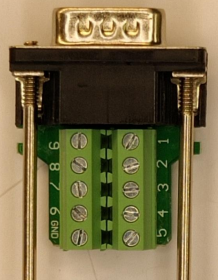
One by one, move the wires from the old DB9 to the new DB9.
- Brown wire --> move to PIN 5 in the new DB9
- White wire (label RS485 TX) in PIN 3 --> move to PIN 3 in the new DB9
- White wire (label RS485 RX) in PIN 8 --> move to PIN 8 in the new DB9
Step 4
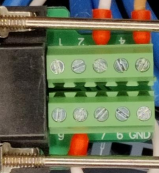
Before mounting the new DB9 into the communication module again, make sure the mounting screws are completely retracted (example in image below).
If the screws are sticking out from the plug base, the DB9 will not be securely fixed to the communication terminal.
Step 5
Secure the new DB9 connector into the communication module and secure it with the long mounting screws. Then, close the plastic cover.