
A successful crop starts with accurate seeding. By taking a few minutes to properly set up your FarmDroid before entering the field, you can improve seed placement, achieve more uniform emergence, and create the conditions for stronger crop establishment.
This guide will help you prepare your seeding units for reliable performance and consistent results.
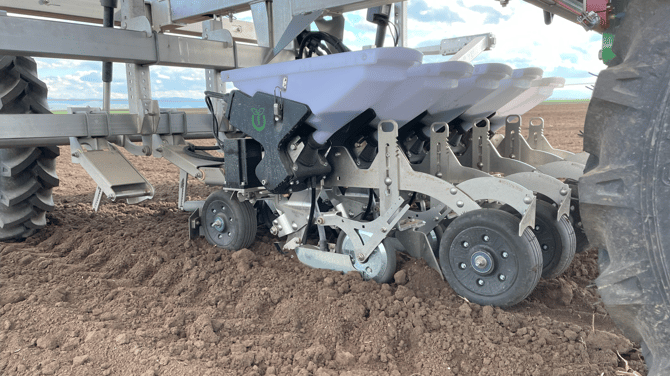
1. Match the Tool Beam to Your Row Spacing
To achieve accurate row alignment, start by confirming that the tool beam is set to the correct seeding position.
Choose the position that matches your intended row spacing. For example, when seeding at 500 mm row spacing, select the "SEED 500MM" position.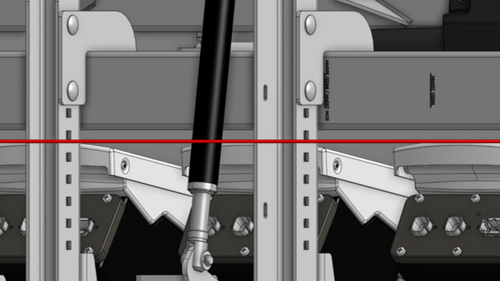
Getting this setting right from the beginning ensures that all seeding units are aligned correctly and working exactly where you expect them to.
2. Prepare Your Active Trailers
Before heading into the field, take a moment to inspect each active trailer. A properly prepared trailer helps maintain accurate seed singulation and reliable seed placement throughout the operation.
Check that:
- The trailer is set to the seeding position.
- The correct seed disc is installed.
- The distance ring (spacer) is installed correctly.
- The light sensor is clean.
- The seed valve is free from dust, soil, and debris.
Clean sensors and seed delivery components help prevent inaccuracies and support consistent seeding performance.
3. Set the Right Seeding Depth
Correct seeding depth is essential for even germination and crop emergence.
You can adjust seeding depth by moving each seeding unit up or down on the rail. As you make adjustments, keep in mind that actual seed placement can be influenced by:
- Soil conditions
- Ground firmness
- Hitch pressure applied to the machine
For best results, apply only the amount of hitch force necessary. Excessive pressure can affect working depth and reduce seeding accuracy.
Tip: Always verify seed depth in the field by digging up seeds after making adjustments. Actual placement is a more reliable indicator than the mechanical setting alone.
4. Fine-Tune Key Seeding Unit Settings
Several settings work together to help you achieve accurate seed placement and smooth field performance.
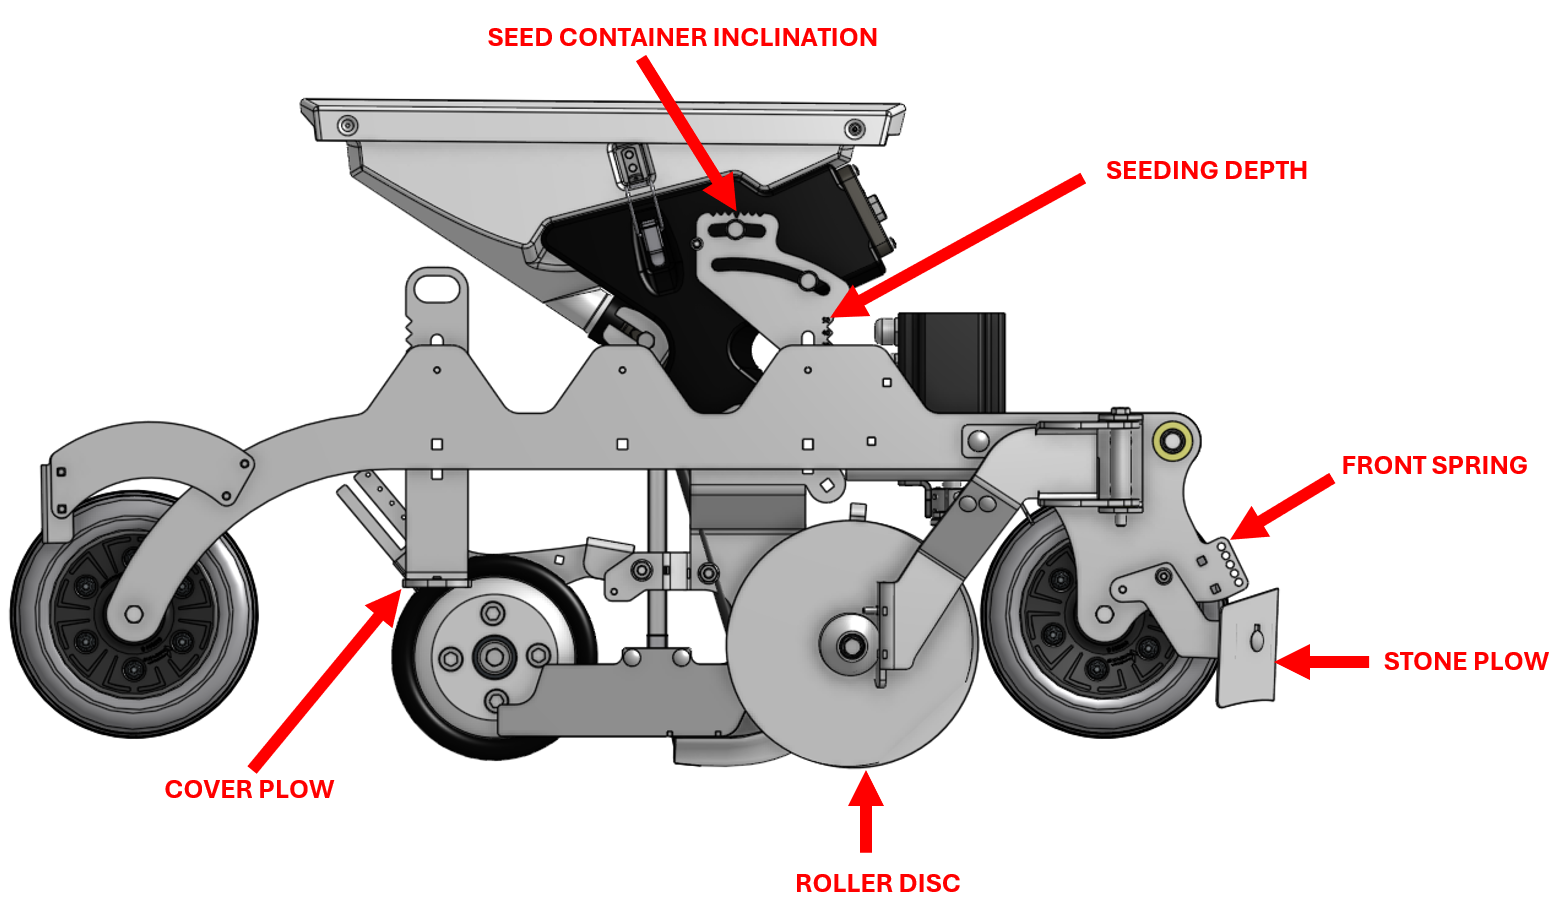
Seed Container Inclination
Unless your seed test recommends otherwise, keep the container in the neutral position.
This is typically done by placing the adjustment bolt in the deeper notch position.
Front Spring
The front spring controls how pressure is distributed across the support wheels.
- Upper hole: More pressure on the front wheel
- Lower hole: More pressure on the rear wheel
In most cases, adjustment is only needed when field conditions require it.
Roller Disc
To maintain seeding and weeding accuracy, ensure the roller disc never runs lower than the coulter.
A roller disc set too low can negatively affect both seeding quality and later weeding performance.
Cover Plow
Adjust the cover plow according to:
- Your desired covering depth
- The distance from the seed row
The goal is to cover the seed effectively without disturbing its placement.
Stone Plow
The stone plow should run just above the soil surface.
If it penetrates the soil, it can create unnecessary soil disturbance and make early weeding operations more challenging.
5. Verify Performance in the Field
Once setup is complete, begin seeding and perform a quick field check.
Inspect:
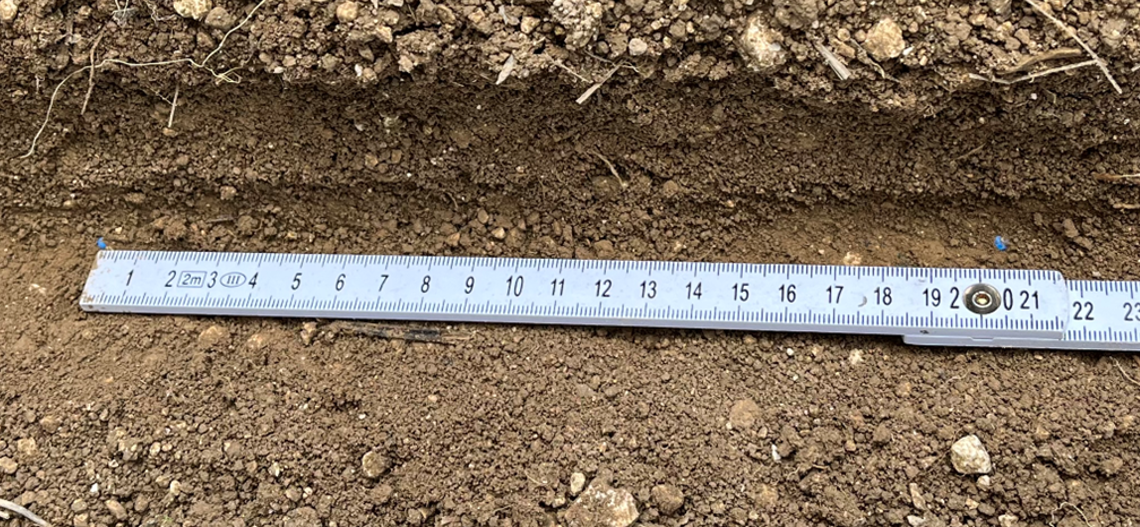
- Seed depth
- Seed spacing
Spending a few minutes checking the first meters of operation can save significant time and prevent issues across the rest of the field.
Dig up several seeds and confirm they match your target settings. If needed, make small adjustments and verify the results again before continuing.
Video: optimal seeding. Notice the V-shape of the furrow
Best Practices for Consistent Results
Do
✅ Follow the settings recommended by your seed test.
✅ Perform a seed test on every individual seeding unit before starting field operations.
✅ Remove passive trailers when seeding.
✅ Clean seeding units with compressed air after every operation.
Regular cleaning helps maintain sensor accuracy and reduces the risk of seeding errors caused by dust and debris.
Don't
❌ Exceed the recommended operating speed.
❌ Use different seed disc types at the same time.
❌ Lower the hitch below 75% before the robot starts driving.
Following these recommendations helps your FarmDroid deliver stable performance and consistent planting quality.