
Seeding is one of the most important operations of the season. Since it is typically performed only once per crop cycle, getting it right from the start is essential. Accurate seeding creates the foundation for healthy crop establishment, consistent emergence, and more precise mechanical weeding later in the season.
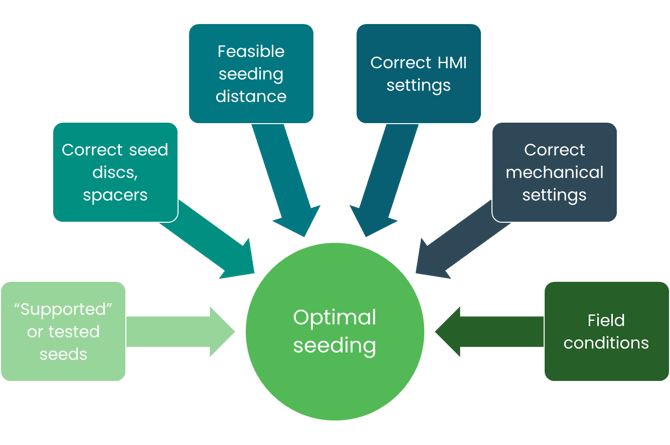
To help you achieve the best possible results with your FD20, focus on the following key areas before starting your seeding operation.
-
Make Sure Your Seed Is Compatible
Your success starts with choosing a seed that performs reliably with the FD20. Different seed types, shapes, and sizes can behave differently during the seeding process, so verifying compatibility is an important first step.If you are unsure whether your crop has been tested, contact your local distributor or request a complimentary evaluation through our Seed Lab.
Learn more: Tested Crops
-
Select the Correct Seed Disc and Distance Ring
Accurate seed placement depends on using the right seed disc and distance ring combination. To ensure consistent performance, the seed disc and distance ring must have exactly the same thickness.Taking a few moments to verify this setup can significantly improve seeding accuracy and help avoid spacing inconsistencies in the field.
Learn more: Seed Discs and Distance Rings
-
Choose a Realistic Plant Spacing
The desired spacing between plants influences which seed disc should be used.As a general guideline:
- Seed discs with more holes are better suited for closer plant spacing.
- Example: A 20-hole disc typically supports spacing between 2 and 5 cm.
- Seed discs with fewer holes are recommended for wider spacing.
- Example: A 5-hole disc typically supports spacing between 10 and 30 cm.
When planning your setup, remember that the automatic seed valve opening and closing function is only available when the seeding distance is set to 10 cm or greater.
- Seed discs with more holes are better suited for closer plant spacing.
-
Verify Your Robot Settings Before You Start
Even with the correct hardware setup, seeding performance depends on proper robot configuration.Before entering the field, review critical HMI settings such as:
- Driving speed
- Light sensor sensitivity
- Seed valve configuration
- Route settings
For most applications, the recommended workflow is to seed the passes first and then complete the headlands. A quick settings review before starting can prevent unnecessary interruptions and ensure consistent field performance.
-
Ensure All Mechanical Settings Are Consistent
Consistency across all seeding units is key to achieving uniform crop emergence.Check that each trailer is configured identically, including:
- Seeding depth
- Front spring adjustment
- Seed cover plow position
- Distribution of additional weights
Uniform settings help ensure every seed is placed under similar conditions, leading to more even crop development across the field.
-
Start with the Right Field Conditions
Even the best equipment setup cannot compensate for a poor seedbed. Field conditions have a direct impact on seed placement, germination, and crop establishment.Before seeding, ensure that the seedbed is properly prepared and suitable for your crop, soil type, and local weather conditions. Since every field is different, the ideal preparation method may vary depending on your specific environment.
A Final Recommendation 👇
Successful seeding is the result of several factors working together: compatible seeds, the correct hardware configuration, proper robot settings, consistent mechanical adjustments, and suitable field conditions. Taking the time to verify each of these areas before seeding can help maximize emergence, improve weeding precision, and give your crop the strongest possible start.