
Tools needed
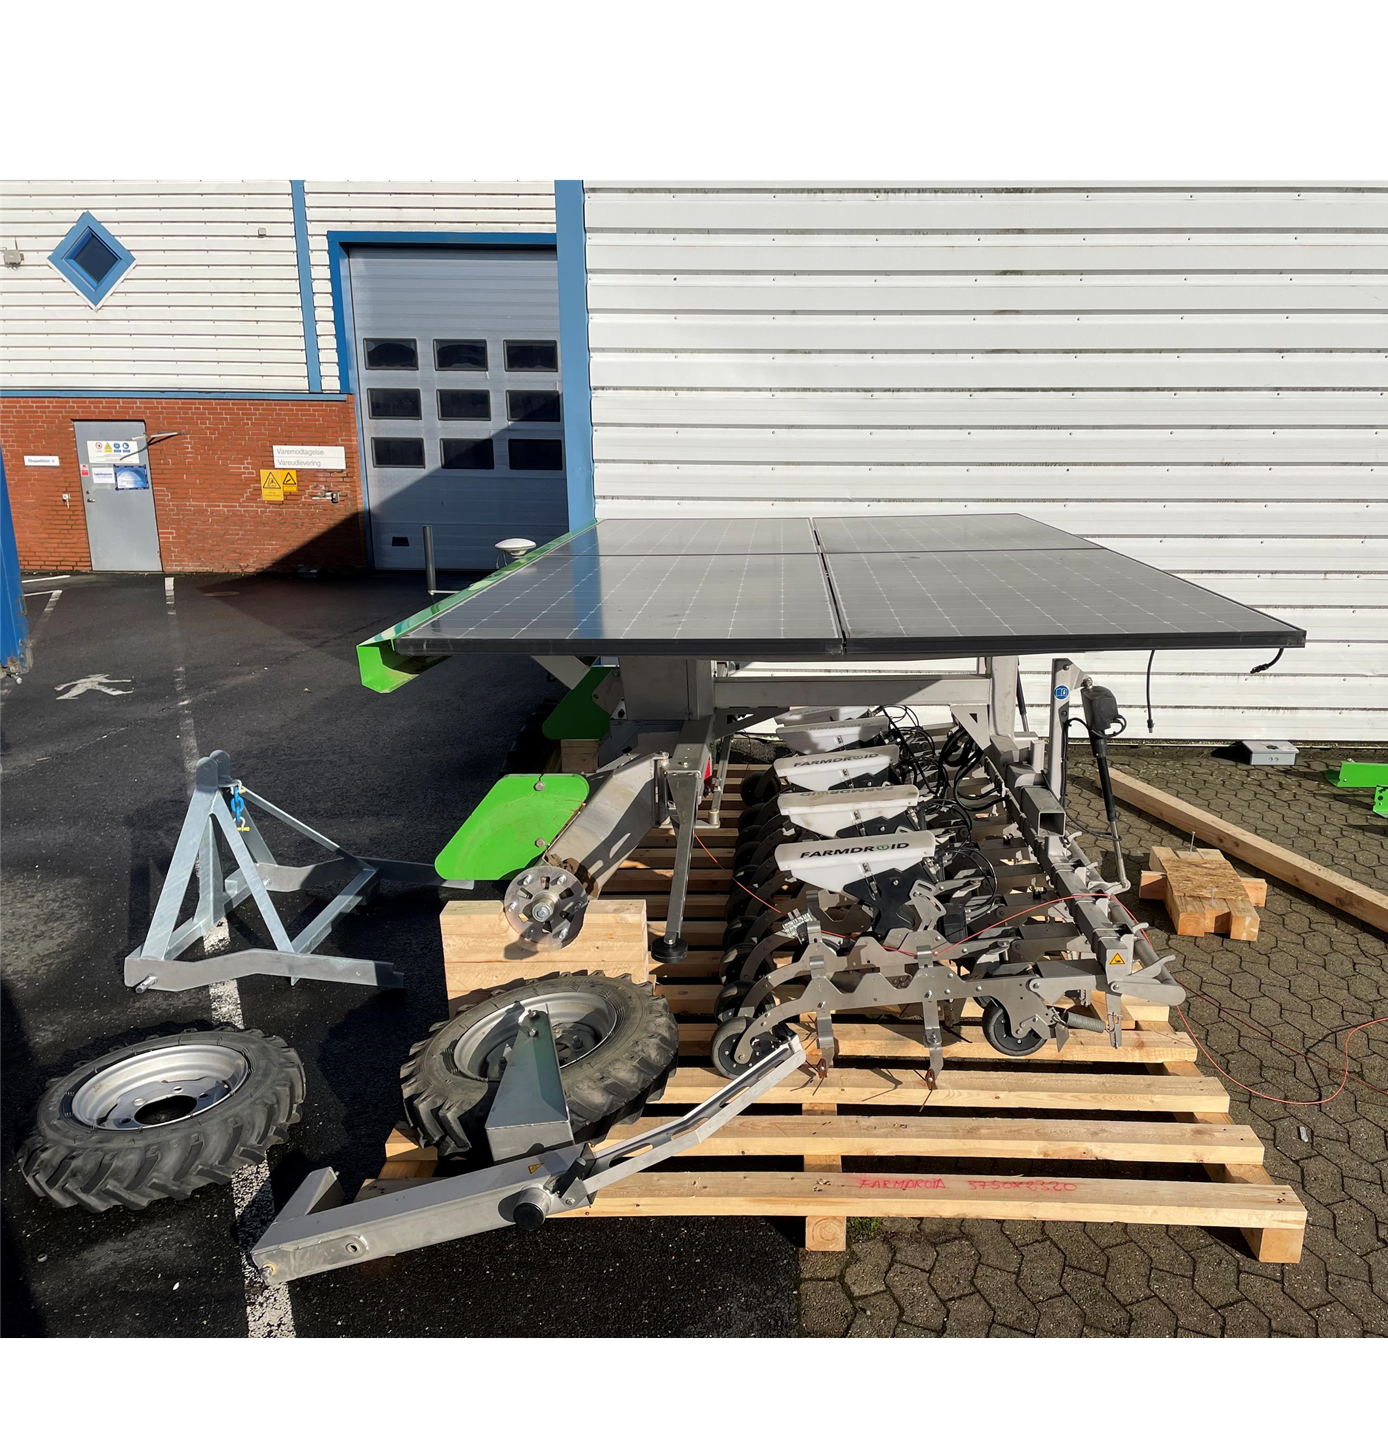
For overseas shipment, each FD20 has to be placed on a pallet and to be partially disassembled, in order to fit inside the container.
To prevent any misunderstanding regarding the part name, we strongly recommend you to look at the user manual, as well as to the spare part catalogue, prior to the assembly of the robot.
The tools required for this task are:
| Wrench size | Part |
| 10 mm | side and front skirts |
| 13 mm | safety wire bars |
| 19 mm | wheel assembly |
| 24 mm | ballast weights |
| 27 mm | rear wheels |
FarmDroid strongly recommends to wear personal protection equipment during the assembly process.
Parts to assemble
Before moving the robot away from the shipping pallet, you must assemble the following parts in this specific order:
- Left and right-side skirts
- Two front skirts
- Rain sensor
- Front RTK antenna
- Connect the electrical wires
- Front wheel assembly
- Safety arm assembly
- Left and right safety wire bars
- Tension the safety wire
- Install both rear wheels
- Secure the 2x35 kg additional weights
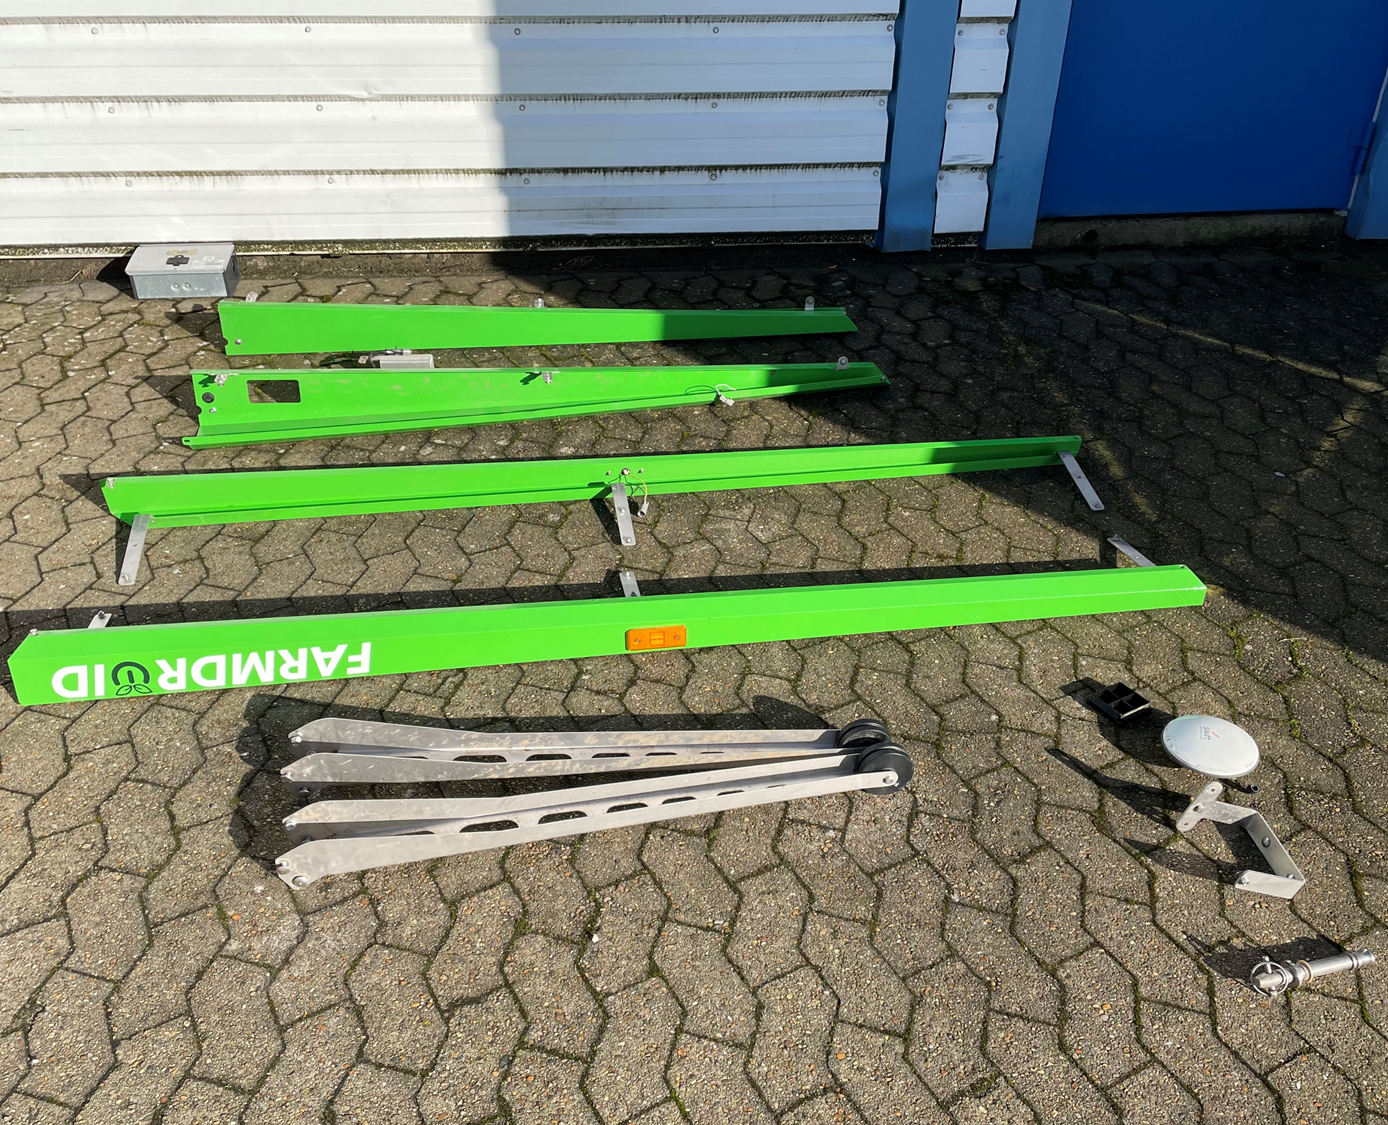
SOLAR PANEL SKIRTS IDENTIFICATION
The skirts are the green parts that cover the four side of the solar panels. Their function is to hide the electrical wiring, as well as to house the lights.
In the image below, we can see, top to bottom:
1.Front-left side skirt
2.Front-right side skirt, with housing for the rain sensor
3.Right-side skirt
4.Left-side skirt
Note: Left and right sides are determined by looking at the robot from the rear position. Side skirts have orange lights, front skirts have white lights.
Step by step guide


