WEED CUTTING DISCS: how to install
Introduction - How to install
 Weed cutting discs in actions
INTRODUCTION
The weed cutting discs consists in two convex discs that run along the row, breaking the soil next to the plants and uprooting the weeds. These discs are meant especially for early crop-stages weeding and are valuable especially in those situations where soils tend to form a superficial crust.
This upgrade is installed on passive trailers only.
CAUTION 😊👇
Before ordering a set of weed cutting discs, remember to state the distance between the rows:
- 109011038R00 - WEED CUTTING DISC ADD-ON, 250 MM TRAILER DISTANCE
This will fit both 500 mm and 250 mm spacing between the active rows - 109011027R00 - WEED CUTTING DISC ADD-ON, 225 MM TRAILER DISTANCE
This will fit 450 mm spacing between the active rows
PLEASE MIND THAT, IF YOU ROBOT IS MOUNTING THE WEED CUTTING DISCS, THE WEEDING POSITION OF THE TOOL BEAMS MUST BE 125MM TO THE LEFT OF THE SEEDING ENGRAVING YOU USED FOR SEEDING.
The discs can be easily adjusted in:
- Working depth: to have a deeper or shallower action
- Distance between the two discs: in order to fit the size of the crop and field conditions
- Pitch of the discs: to remove more or less soil from the row
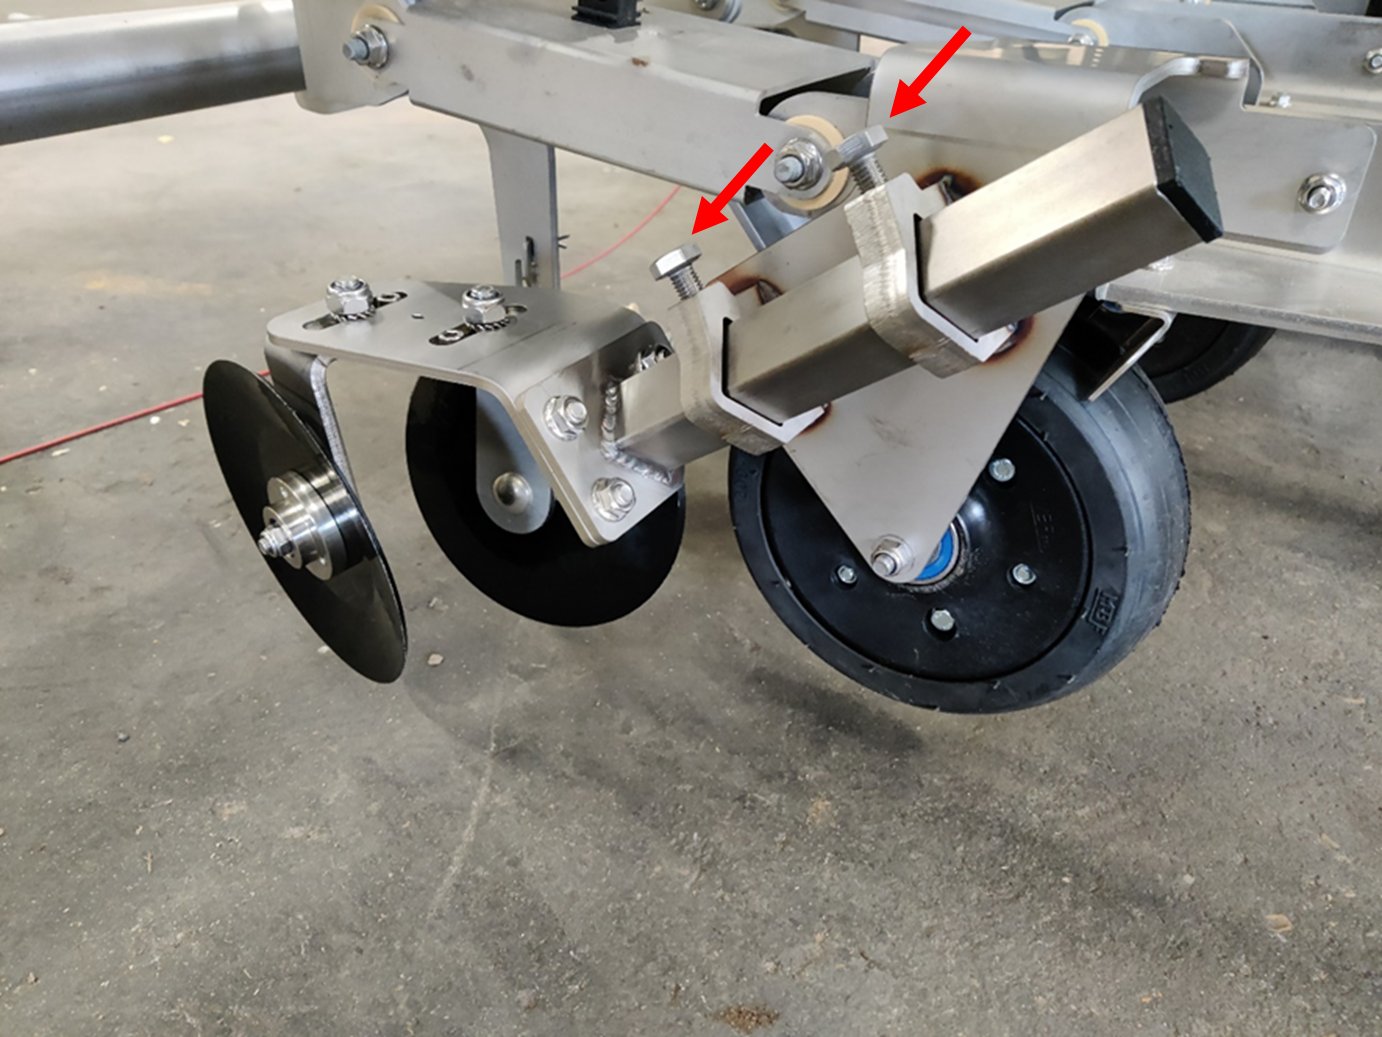
This is how a correctly installed set would look like.

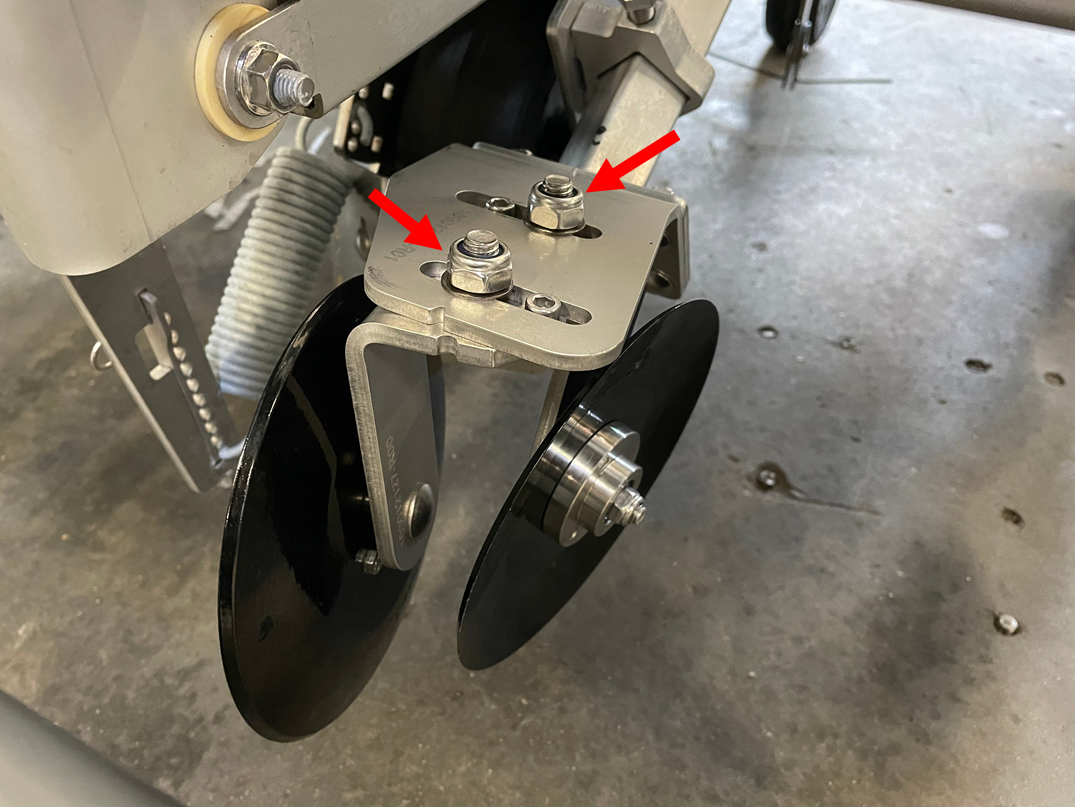
Adjusting the distance between the discs just requires to unscrew the nuts and move the discs along the gaps on the brackets:
NOTE 😀👍
the weeding wire on the back of the passive trailer, where the weed cutting disc is mounted, should be either removed or adjusted in order not to be above the crop!
HOW TO INSTALL
STEP 1
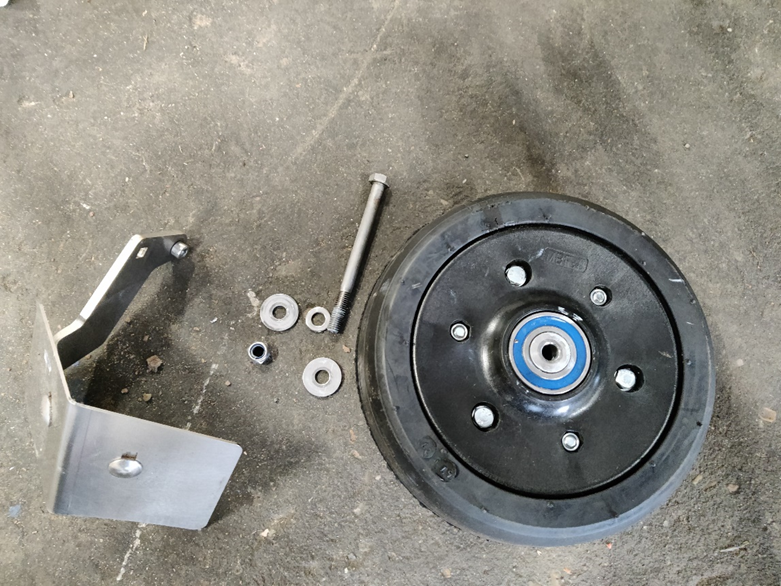
Disassemble the front plow and the front wheel from the passive trailer
STEP 2
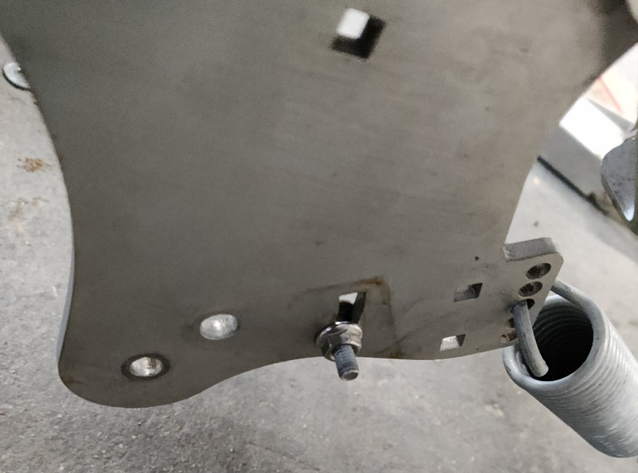
Keep the bolt of the front plow in place and secure it by tighten slightly the flange nut
STEP 3
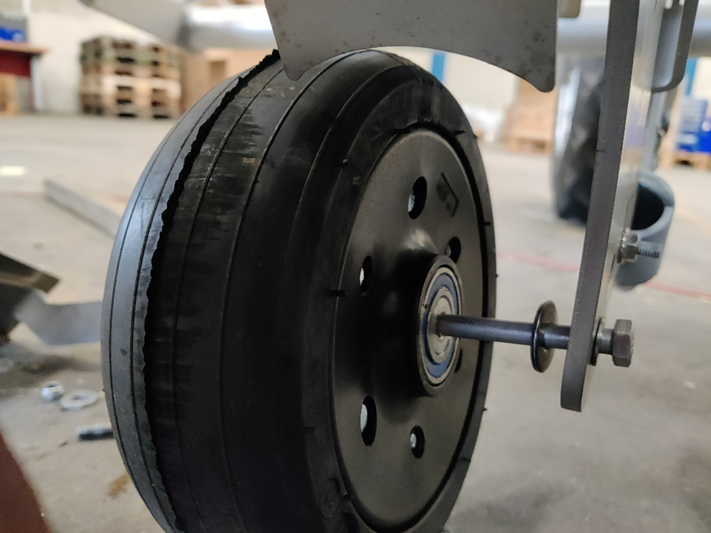
Reassemble the front wheel, this time using the supplied bolt. Remember to use the washers, as shown in the image below
STEP 4
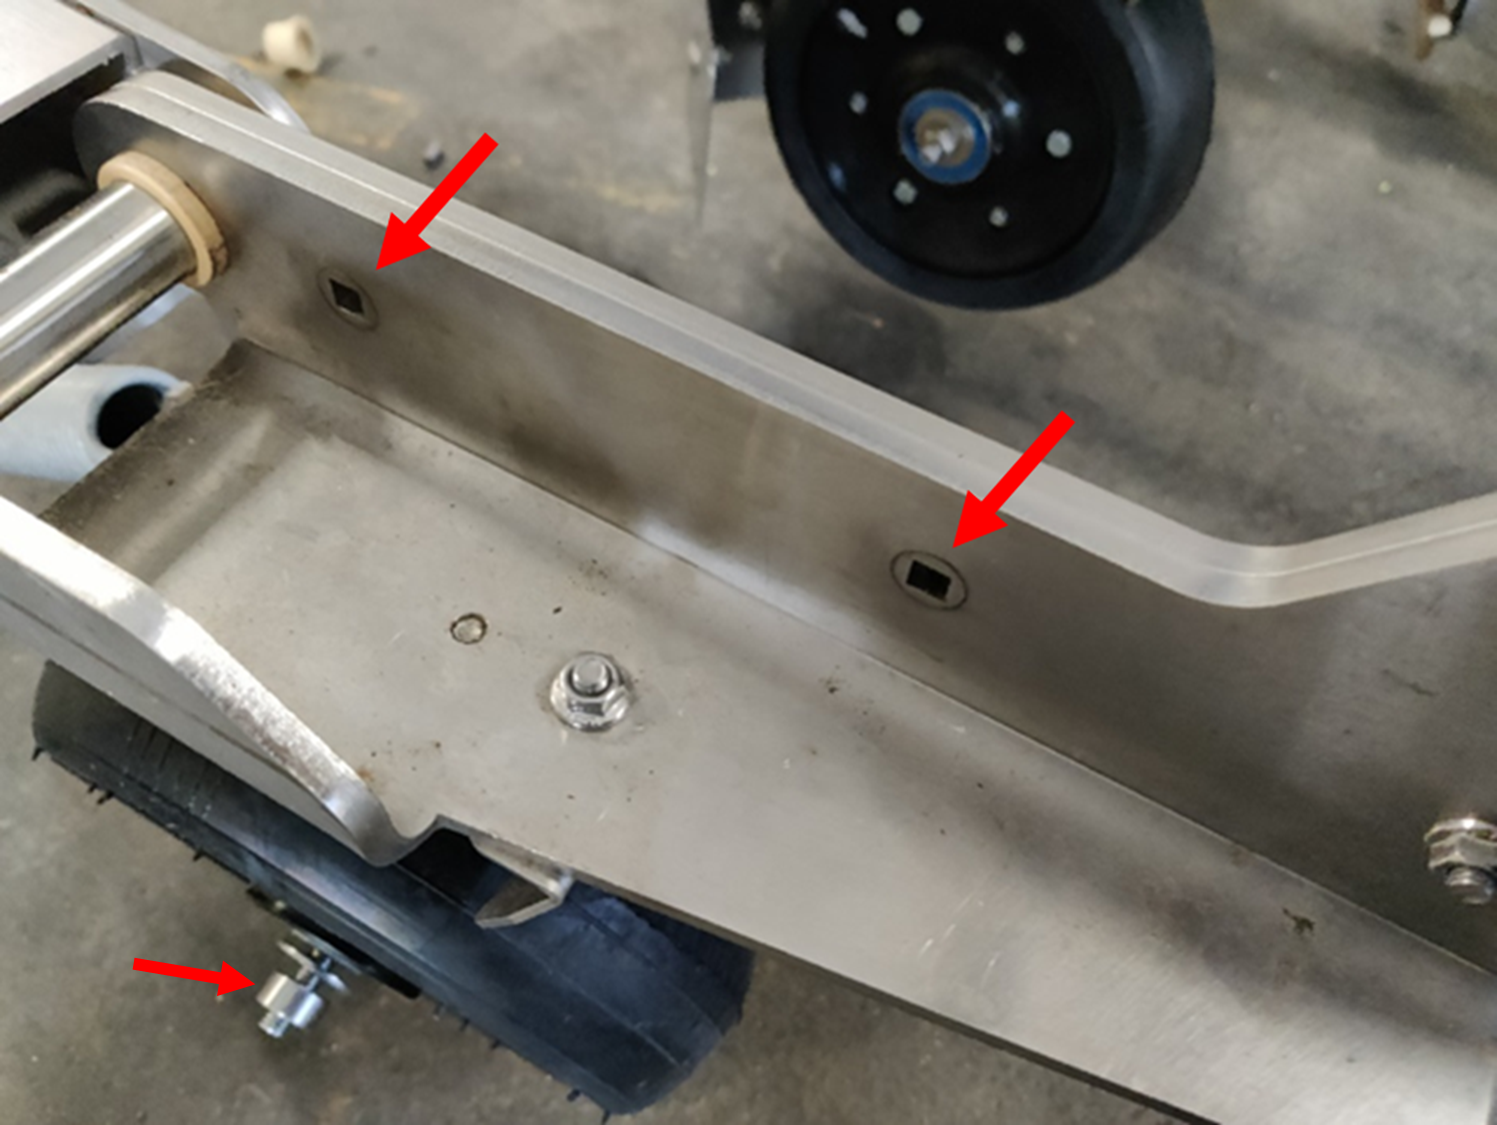
Remove the two 6 mm bolts from the side of the passive trailer. Mount the bushing and steel washer by the wheel
STEP 5
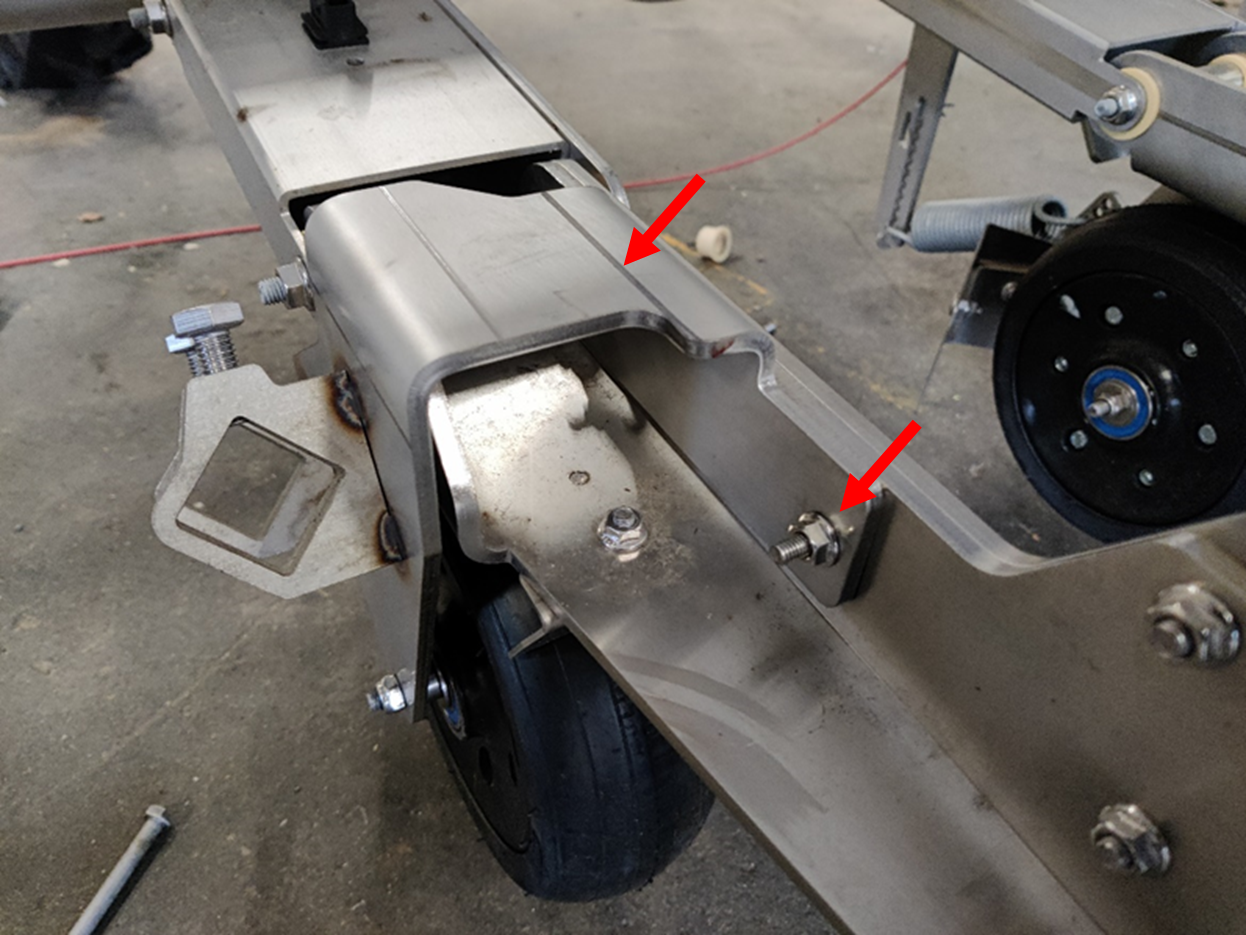
Install the new bracket, fitting the supplied 6 mm bolts in the top part
STEP 6
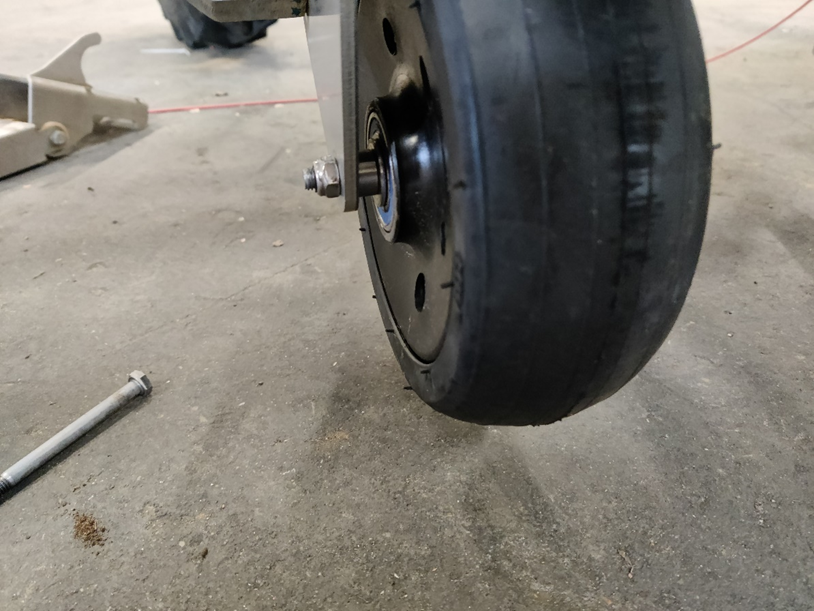
Tighten the nut fixing the new bracket to the front wheel
STEP 7
Insert the weed cutting disc arm into the support bracket
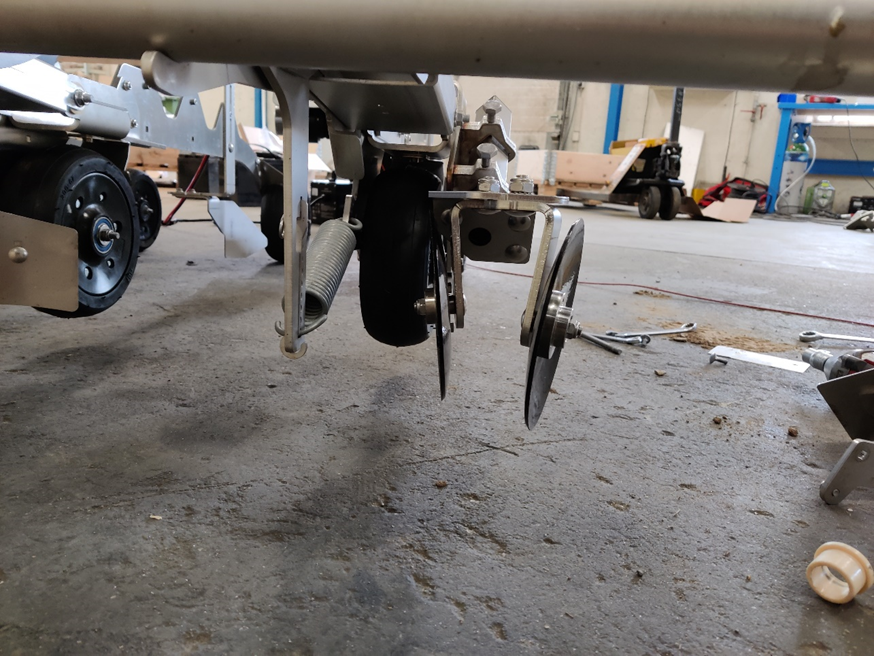
STEP 8
use the two 10mm bolts to keep the weeding disk assembly in place, as well as to adjust the working depth of the discs
